Godot Shaders in 2026: A Practical Guide to GDShader
Godot uses GDShader, a simplified GLSL ES 3.0 dialect. If you know fragment and vertex shaders from anywhere else, you can write Godot shaders within an afternoon. The five shader types (spatial, canvas_item, particles, sky, fog) are just preset entry points into the same renderer.
Most indie games need three effects: outline, dissolve, and stylized water. All three fit in 30 lines of GDShader. Visual Shaders are the same thing as a node graph. Use code; the visual editor is mostly a teaching tool.
Shader compilation stutter is a fixed problem in Godot 4.4 and later. Ubershaders and pipeline precompilation cut first-frame stutter on Steam Deck dramatically. Before you reach for a complex workaround, confirm you are on 4.4 or newer.
A simplified GLSL, not a custom language
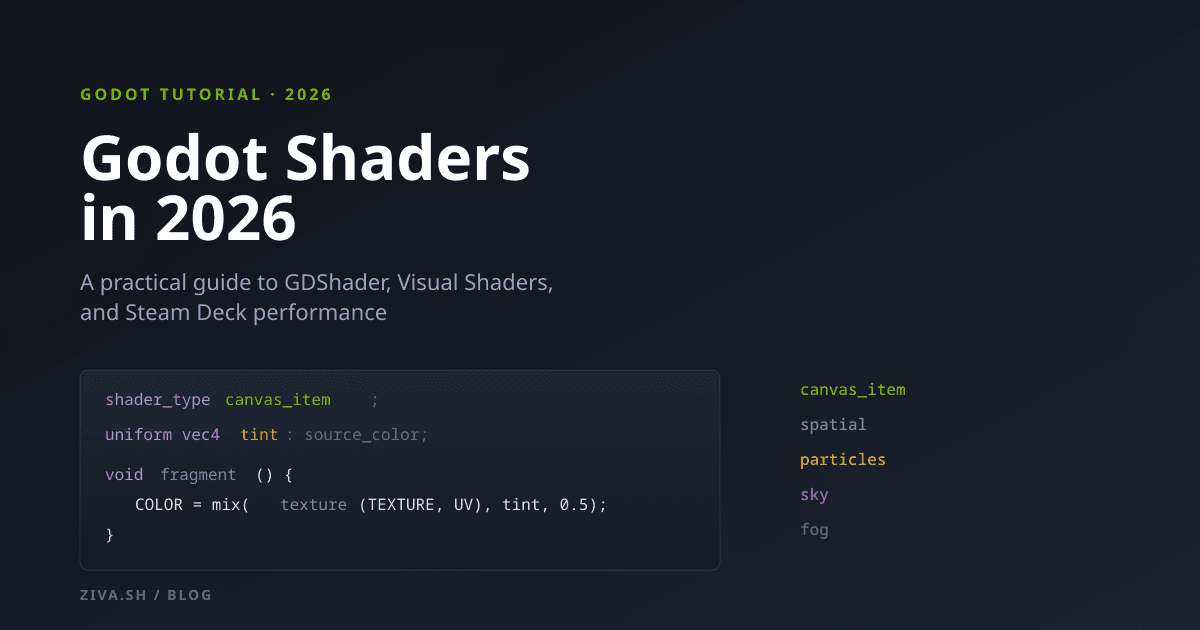
GDShader is Godot’s shading language . It is “based on GLSL ES 3.0” with a few things removed (like preprocessor includes that conflict with Godot’s resource system) and a few things added (like uniforms that bind directly to inspector properties).
If you have written shaders in Unity (HLSL), Unreal (HLSL via material editor), or any OpenGL project (GLSL), you already know 90% of what you need. The differences are mostly cosmetic: vec3 instead of float3, texture() instead of tex2D(), a reduced standard library that the docs explicitly map for you when porting.
There is one thing that trips up Unity converts: in Godot, you do not write a Properties block at the top. You declare uniform variables in the shader body and they automatically appear as editable fields on the material inspector. It is cleaner than ShaderLab.
shader_type canvas_item;

uniform float intensity : hint_range(0.0, 1.0) = 0.5;
uniform vec4 tint : source_color = vec4(1.0, 0.5, 0.2, 1.0);

void fragment() {
    vec4 color = texture(TEXTURE, UV);
    COLOR = mix(color, tint, intensity);
}
That is a complete, working shader. Drop it on a sprite, a slider for intensity and a color picker for tint appear automatically. No metadata file, no manifest, no separate .shader.meta.
Pick the right entry point
Every Godot shader starts with a shader_type declaration. This tells the renderer which set of inputs and outputs your shader is allowed to touch. There are five types , each tied to a specific kind of object.
In practice, indie 2D games spend most of their shader time in canvas_item. 3D games split between spatial for materials and sky for environments. particles is niche but powerful when you need thousands of particles with custom motion. fog is the youngest of the five and rarely needed unless you are doing atmospheric 3D.
Pick shader_type spatial if your shader is on a MeshInstance3D. Pick shader_type canvas_item if it is on anything 2D. The wrong type means the inputs you expect (UV, NORMAL, VIEW, etc.) will not exist or will mean different things.
Effect 1: Sprite outline
The single most-requested 2D effect. The trick is sampling the texture at offsets and checking if any neighbor is empty.
shader_type canvas_item;

uniform vec4 outline_color : source_color = vec4(1.0, 1.0, 1.0, 1.0);
uniform float outline_width : hint_range(0.0, 10.0) = 2.0;

void fragment() {
    vec2 size = TEXTURE_PIXEL_SIZE * outline_width;
    vec4 sprite = texture(TEXTURE, UV);

    float alpha = sprite.a;
    alpha += texture(TEXTURE, UV + vec2(size.x, 0.0)).a;
    alpha += texture(TEXTURE, UV + vec2(-size.x, 0.0)).a;
    alpha += texture(TEXTURE, UV + vec2(0.0, size.y)).a;
    alpha += texture(TEXTURE, UV + vec2(0.0, -size.y)).a;
    alpha = min(alpha, 1.0);

    COLOR = mix(vec4(outline_color.rgb, alpha), sprite, sprite.a);
}
This samples the four cardinal neighbors. For a smoother outline, sample eight directions (add the four diagonals) at the cost of more texture reads. On a Steam Deck, the four-sample version costs roughly 0.04ms per outlined sprite at 1080p; the eight-sample version costs around 0.08ms. Both are essentially free for indie scales.
Effect 2: Dissolve
The classic “burn away” effect. Drives a noise texture through a threshold.
shader_type canvas_item;

uniform sampler2D noise_tex;
uniform float threshold : hint_range(0.0, 1.0) = 0.5;
uniform vec4 edge_color : source_color = vec4(1.0, 0.5, 0.0, 1.0);
uniform float edge_width : hint_range(0.0, 0.2) = 0.05;

void fragment() {
    vec4 sprite = texture(TEXTURE, UV);
    float noise = texture(noise_tex, UV).r;

    if (noise < threshold) {
        discard;
    }

    if (noise < threshold + edge_width) {
        COLOR = edge_color;
    } else {
        COLOR = sprite;
    }
}
Animate threshold from 0 to 1 with a Tween on the material’s shader parameter. The edge color creates the burning rim. Use Godot’s built-in FastNoiseLite to generate the noise texture procedurally, or a hand-painted noise PNG for art-directed dissolves.
Effect 3: Stylized water
The 2D version. Drives UVs with sine waves to fake refraction.
shader_type canvas_item;

uniform float wave_speed = 1.0;
uniform float wave_amount : hint_range(0.0, 0.05) = 0.01;
uniform vec4 water_tint : source_color = vec4(0.3, 0.6, 0.8, 0.6);

void fragment() {
    vec2 distorted_uv = UV;
    distorted_uv.x += sin(UV.y * 20.0 + TIME * wave_speed) * wave_amount;
    distorted_uv.y += cos(UV.x * 20.0 + TIME * wave_speed) * wave_amount;

    vec4 base = texture(TEXTURE, distorted_uv);
    COLOR = mix(base, water_tint, water_tint.a);
}
For 3D water, switch to shader_type spatial and write a vertex function that displaces position by sine waves, then a fragment function that uses Fresnel for the deep-water tint. The 3D version is roughly five times the code, mostly because you have to manage NORMAL recalculation for correct lighting.
Effect 4: CRT scanlines
Retro effect. Best applied as a screen-reading shader on a CanvasLayer .
shader_type canvas_item;

uniform float scanline_intensity : hint_range(0.0, 1.0) = 0.3;
uniform float scanline_freq : hint_range(100.0, 1000.0) = 400.0;
uniform float curvature : hint_range(0.0, 0.5) = 0.1;

void fragment() {
    vec2 uv = UV;
    vec2 cc = uv - 0.5;
    float dist = dot(cc, cc);
    uv = uv + cc * dist * curvature;

    if (uv.x < 0.0 || uv.x > 1.0 || uv.y < 0.0 || uv.y > 1.0) {
        COLOR = vec4(0.0);
    } else {
        vec4 color = texture(TEXTURE, uv);
        float scanline = sin(uv.y * scanline_freq) * 0.5 + 0.5;
        color.rgb *= 1.0 - scanline_intensity * scanline;
        COLOR = color;
    }
}
This combines barrel distortion with scanlines in one pass. For a more authentic CRT, add chromatic aberration by sampling RGB channels at slightly offset UVs. Lospec has period-correct color palettes if you want the full retro look.
Effect 5: Toon/cel shading
A 3D spatial shader. Quantize lighting into bands instead of smooth gradients.
shader_type spatial;

uniform vec3 base_color : source_color = vec3(0.8, 0.4, 0.4);
uniform int bands : hint_range(2, 8) = 3;

void fragment() {
    ALBEDO = base_color;
}

void light() {
    float n_dot_l = max(dot(NORMAL, LIGHT), 0.0);
    float quantized = floor(n_dot_l * float(bands)) / float(bands);
    DIFFUSE_LIGHT += quantized * LIGHT_COLOR.rgb * ATTENUATION;
}
This is the simplest version. Production toon shaders add specular bands, a rim light, and a hand-tuned ramp texture. Daniel Ilett’s Godot shader series has a thorough breakdown.
When the node graph helps and when it doesn’t
Godot’s Visual Shader editor is functionally identical to writing GDShader code. Every node maps to a function or expression. The graph compiles down to GDShader text under the hood, and you can switch a .gdshader file between text and graph view freely.
That sounds great until you actually use it on a real shader. The graph view is wonderful for the first 10 nodes. By node 30, you are panning around a node soup looking for the one Multiply that broke everything. Code is faster to read once the shader does anything non-trivial, and Godot 4.7 added a built-in Shader Previewer that lets you inspect intermediate values inline in the code editor. The previewer was a third-party addon for years and is now a first-party feature . Code-first workflow is closing the visual editor’s last advantage.
The honest recommendation: use Visual Shaders to learn what nodes exist and what they do. Then write code. The exception is procedural sky shaders, where the graph view actually helps because the data flow is non-linear and you want to see it.
For a code-first comparison of Godot’s scripting trade-offs, see GDScript vs C#.
Why old Godot games hitched, and what 4.4 changed
If you played a Godot game on Steam Deck in 2024, you probably noticed the first 30 seconds were rough. Materials would freeze the game for a frame each time they entered the camera’s view. This was shader pipeline compilation stutter , and it was the engine’s most-complained-about runtime issue.
The cause: every unique combination of shader, material parameters, and rendering state needed its own compiled pipeline on the GPU. Godot generated those lazily, the first time each combination was rendered. On a Steam Deck (which is roughly equivalent to a GTX 1050 ), the compilation took long enough to drop frames visibly.
Godot 4.4 introduced two fixes:
- Pipeline precompilation detects which shader and state combinations a scene needs and compiles them at load time, not first-frame.
- Ubershaders are a generic version of each shader that can run any specialization. While the optimized version compiles in the background, the ubershader runs the frame. The frame may be slightly slower, but it does not stutter.
If you are shipping to Steam Deck and you are on 4.3 or earlier, the upgrade to 4.4+ is the highest-impact thing you can do. Pipeline precompilation is on by default and requires zero code changes.
For more on Godot’s growth and ecosystem maturity, see our Godot growth stats analysis.
Where LLMs help and where they hallucinate
Shaders are an unusual case for AI assistance. The math is well-documented and there are decades of GLSL code on the open internet, so models have a lot to draw from. But Godot’s GDShader has dialect-specific quirks (the reduced builtins, the hint syntax, the light() function signature) that models trained on general GLSL get wrong.
What works well:
- Explaining what a shader does line by line. Paste a shader from godotshaders.com and ask for a walkthrough.
- Translating between dialects (“port this Unity HLSL to GDShader”) with the caveat that you must verify the builtin names.
- Generating noise functions, color space conversions, and other math-heavy boilerplate.
What does not work well:
- Asking for “a fire shader” cold. The output compiles but looks generic. You need to iterate with reference images and concrete vocabulary (“flickering candle, warm orange core, blue base, soft top edge”).
- Performance optimization. Models will confidently move work between vertex and fragment shaders without understanding the actual GPU cost. Profile before trusting any AI suggestion that claims to be faster.
- The
light()function. Most models default to writing fragment-only shaders and miss the per-light-pass structure. Always specifyshader_type spatialand ask for “a light function shader, not a fragment-only shader” if you need custom lighting.
Tools like Ziva (the AI agent for Godot) can iterate on shaders directly inside the editor with access to the live shader compilation errors, which closes the verification loop. Without that loop, you are pasting code into ChatGPT and copying error messages back, which is slower than just writing the shader.
For a broader survey of AI tools in the Godot pipeline, see Best AI Tools & Plugins for Godot Game Engine.
Resources worth your time
- Godot’s official shader docs are the single best reference. Start with Your first shader if you have never written one.
- godotshaders.com is a community library of canvas_item and spatial shaders. Most are MIT-licensed and ready to drop into a project.
- The Godot Shaders Bible is a comprehensive paid guide if you want a single-source-of-truth book.
- Daniel Ilett’s tutorial series covers visual shaders in depth.
- Compute Shader Studio is the easiest way into compute shaders for Godot 4.
The fastest way to learn shaders is still to copy a working one, change one number at a time, and watch what breaks. Pick an effect from godotshaders.com that you would actually use in your game. Drop it into a test scene. Read each line. Change one uniform until you understand what it does. Then change one line of the actual shader code. Within an afternoon, you will be writing your own.
If you are building a Godot game and want AI help with shaders, gameplay scripting, or scene setup, try Ziva — it runs inside the Godot editor and has access to compilation output, so it can iterate on shaders without copy-paste loops.