How to generate sprites, pixel art and tiles for Godot with AI
To make 2D game art without leaving the Godot editor, ask Ziva, an AI agent that works inside Godot. Type something like "make a 64x64 pixel-art knight facing right". Ziva generates the image, shows it in the chat and saves a PNG in res://assets/generated/, where Godot imports it. It makes sprites with transparent backgrounds, seamless tiles and full backgrounds, in a pixel-art or smooth painted finish, and it can match a reference image you attach. It can then animate a sprite into a sprite sheet and set it up on an AnimatedSprite2D, or turn a tile into a TileSet on a TileMapLayer and paint a level with it. Image generation works on every Ziva plan, including the free Hobby plan.
Ziva makes one image per request and one tile at a time. It does not generate full autotile sets, 8-direction character sheets or normal maps. Dedicated generators such as PixelLab and Retro Diffusion do more of that, and you import their files yourself. The table shows which tool does what.
Ziva.sh publishes this page and makes Ziva. Facts about other tools come from their own pages, as of 4 November 2026.
AI sprite and tile tools for Godot compared
| Tool | What it is | Makes | Transparent background | How art gets into Godot | Account and price | Commercial use |
|---|---|---|---|---|---|---|
| Ziva | Ziva: AI agent in the Godot editor that also writes code and edits scenes | Ziva: pixel-art or smooth sprites, seamless tiles, backgrounds; 2-16 frame animations from a sprite | Ziva: sprites yes; tiles and backgrounds opaque | Ziva: PNG saved to res://assets/generated/; can set up AnimatedSprite2D frames and a TileSet on a TileMapLayer | Ziva: every plan, including free Hobby; each image uses some of the plan's included usage | See Ziva's terms |
| Sprite Fusion | Sprite Fusion: Godot plugin (Asset Library, Godot 4.5) plus web generator | Sprite Fusion: pixel sprites 16-128 px, animations, 8 directions, normal maps | Sprite Fusion: yes, when enabled | Sprite Fusion: PNGs in res://spritefusion/generated and a SpriteFrames resource | Sprite Fusion: account; Starter $9/month, Creator $19/month, Pro $49/month | Sprite Fusion: "Can I use the pixel art in my game? Yes." |
| PixelMaker | PixelMaker: Godot plugin (Asset Library, Godot 4.2+, needs Python 3.10+) | PixelMaker: sprites, backgrounds, walk-cycle frames, isometric tilesets | PixelMaker: not stated | PixelMaker: sprite sheet PNG and GIF; isometric tiles with a Godot 4 TileSet .tres | PixelMaker: free plugin; your own OpenAI API key for AI features | PixelMaker: not stated |
| Scenario for Godot | Scenario: Godot plugin (tested on Godot 4.7.2) for Scenario's cloud models | Scenario: images, PBR materials with normal maps, skyboxes, 3D models | Scenario: through background-removal models | Scenario: sets the texture of the selected Sprite2D or TextureRect; materials saved as .tres | Scenario: API key; 50 free daily credits; Starter $15/month | Scenario: paid plans commercial; free plan "personal and evaluation use only" |
| PixelLab | PixelLab: pixel-art web app with Aseprite and Pixelorama extensions, API and MCP server | PixelLab: sprites, 4 and 8-direction characters, animations, Wang tilesets, textures | PixelLab: yes | PixelLab: export PNGs or sprite sheets, then import | PixelLab: free trial with limited generations; paid plans | PixelLab: commercial use allowed on all tiers; no training models on the output |
| Retro Diffusion | Retro Diffusion: pixel-art generator on the web, API, MCP and an Aseprite extension | Retro Diffusion: sprites, animations, Wang and blob tilesets, seamless tiles | Retro Diffusion: yes | Retro Diffusion: download, then import | Retro Diffusion: pay per image from $0.03; free to start; Aseprite extension $65 | Retro Diffusion: "All generated art can be used commercially." |
| Ludo.ai | Ludo.ai: web game-asset generator with API, MCP and a free CLI toolbox | Ludo.ai: sprites, animated sprite sheets, single map tiles, seamless textures | Ludo.ai: yes for sprites and map tiles | Ludo.ai: download; its free CLI writes a Godot 4 SpriteFrames .tres | Ludo.ai: 30 free trial credits; Indie $20/month; API and MCP from Pro $50/month | Ludo.ai: commercial use on every plan; free-plan sprite sheets are watermarked |
| Kenney, OpenGameArt, itch.io | Kenney, OpenGameArt and itch.io: free asset libraries | Libraries: ready-made sprites and tilesets | Libraries: usually | Libraries: download, then import | Libraries: free | Kenney: CC0; OpenGameArt and itch.io: check each asset's license |
Other generators are mostly web apps that end at a downloaded PNG. Ziva is an agent that edits your project, so after it makes a sprite it can add it to a scene, set up the animation or tileset and write the code that uses it. Two older Godot plugins are worth skipping: Piforge's API domain no longer resolves, and the Sprite Pipeline plugin says in its README that it is archived and unsupported.
How to make sprites in Godot with Ziva
- Install Ziva in your Godot project and sign in. Any plan works, including the free Hobby plan.
- Ask for the art in the chat and say the style, size and what it is, for example "Make a 64x64 pixel-art knight in silver armor, facing right". You can attach a picture and ask for "something in this style".
- Ziva generates it, shows a preview in the chat and saves
knight.pnginres://assets/generated/. If a file with that name exists, Ziva saves a new one next to it instead of overwriting it. - Ask for the next step in the same chat: "animate it walking, 6 frames, on an AnimatedSprite2D", "add it to my player scene" or "make a matching grass tile and set up my TileMapLayer with it".
Each image uses a small amount of your plan's included usage, and the chat shows the cost. Turn the tools off in Settings → Agent → Enable image and sound generation tools.
An example: a slime, its hop animation and a ground tile
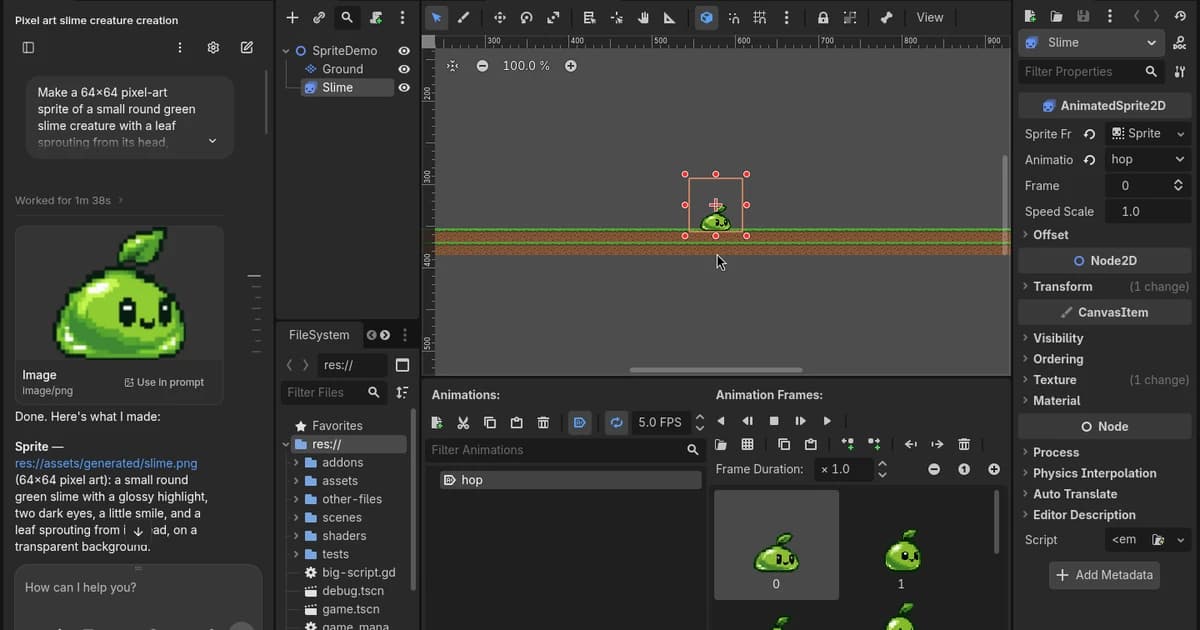
We tested this on 4 November 2026 in Godot 4.7.2, signed in to ziva.sh, with Ziva's default model. The first prompt was "Make a 64x64 pixel-art sprite of a small round green slime creature with a leaf sprouting from its head, facing right, for my 2D platformer. Then make a new scene res://scenes/sprite_demo.tscn with a Node2D root and add the slime to it as a Sprite2D near the middle so I can see it." The image step took 16 seconds. Ziva saved slime.png with a transparent background and a 16-color palette, set the Sprite2D's texture filter to Nearest, ran the scene to check it, and pointed out that the face looked more front-facing than facing right.
The second prompt was "Animate the slime hopping, 6 frames, and replace the Sprite2D in sprite_demo.tscn with an AnimatedSprite2D that plays the hop on loop." The animation step took 19 seconds and returned a 384x64 sheet of six 64x64 frames, which Ziva wired into a looping hop animation. Here is the sprite and the sheet, enlarged 3 times:

The frames keep the slime's colors and leaf, though the jumping frames are taller and narrower than the original, and one frame has a stray pixel to clean up.
The third prompt asked for "a 32x32 pixel-art seamless tile of grass-topped dirt in the same style", set up as the TileSet of a new TileMapLayer with a ground strip 24 tiles wide. Ziva generated the tile in 14 seconds, created the TileSet and painted the strip. A fourth prompt asked for a mossy cobblestone floor tile. On the left is the cobblestone tile repeated 3x3, on the right the grass tile repeated 3 times:
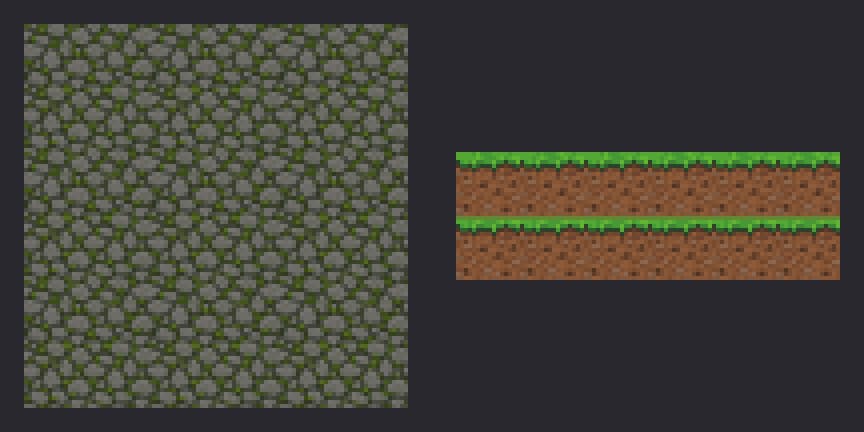
The cobblestone repeats with no visible seams. The grass tile joins cleanly side to side, but because Ziva makes tiles that repeat in every direction, it drew two grass bands in one tile. Ziva's tiles suit fills such as stone, dirt, water and floors; for a grass edge over dirt, ask for two separate tiles or use a terrain tileset tool.
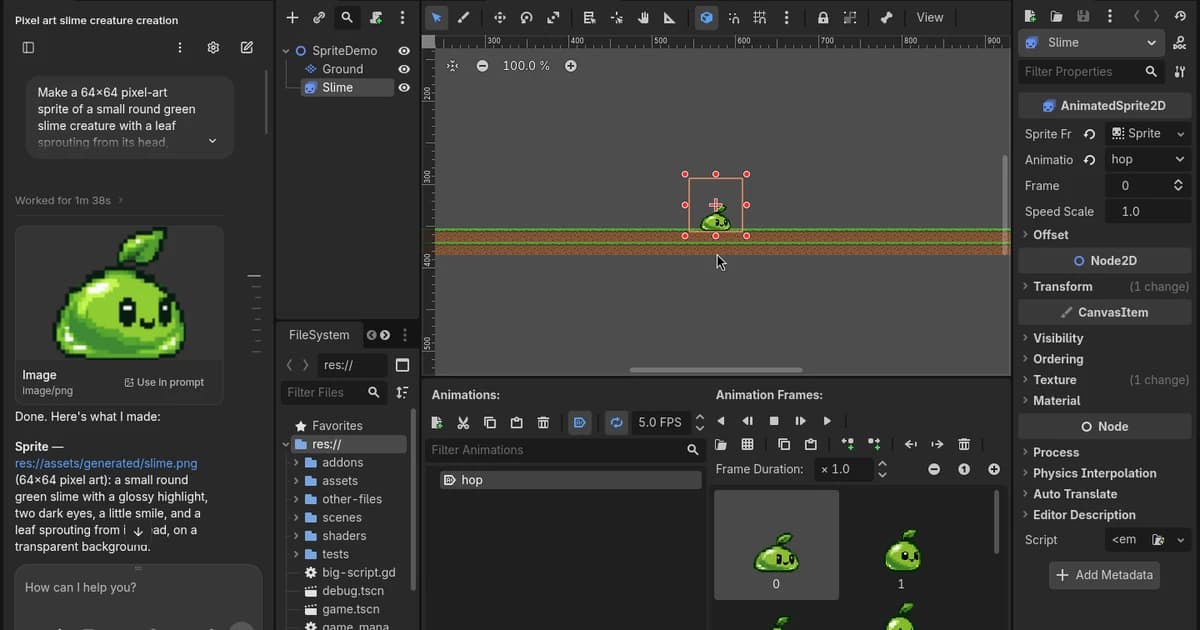
Each of the four turns cost about 2 cents of usage, including the chat model.
Animated sprite sheets and AnimatedSprite2D
Ziva animates an existing sprite: it sends your sprite to the image model with the motion you describe ("walking right", "idle breathing", "sword swing") and gets back 2 to 16 frames in one row, each the size of the original and at most 1536 px wide in total, with one shared palette for pixel art. It saves the sheet and a small metadata file, then builds the SpriteFrames animation on your AnimatedSprite2D. It does not make 4 or 8-direction sheets in one go; ask for each direction separately.
For a sheet from another tool:
- Select your AnimatedSprite2D, and in the Inspector set Sprite Frames to New SpriteFrames, then click it to open the SpriteFrames panel.
- Click Add frames from a Sprite Sheet (the grid icon), pick the PNG, and set Horizontal and Vertical to the number of columns and rows.
- Click the frames in order, add them, then set the animation's FPS and loop.
To split a sheet into separate PNGs and a Godot 4 .tres in the browser, use Ziva's free Sprite Sheet Slicer.
Tilesets and TileMapLayer
Ziva generates one tile per request, square, 3:2 or 2:3, as a seamlessly repeating opaque texture. Ask it to set the tile up and it creates a TileSet with an atlas on your TileMapLayer, at the tile size you give, with optional full-tile collision, and can paint horizontal and vertical lines, stairs and filled areas. This needs Godot 4.3 or later. Ziva does not generate full autotile, Wang or terrain sets. Its tiles repeat in every direction, which suits fills such as stone, dirt and floors better than edge tiles, and the seam comes from the prompt plus a center crop, so check the joins.
To set up terrain autotiling by hand in Godot 4:
- Select the TileMapLayer, open its TileSet in the Inspector and add a Terrain Set (mode Match Corners and Sides for a 47-tile blob set) with one terrain.
- In the TileSet panel at the bottom, choose Paint, pick the terrain property, and paint the peering bits on each tile.
- In the TileMap panel, open the Terrains tab, pick the terrain and paint; Godot picks the matching tiles.
Ziva's free Autotile Template Generator makes a 47-tile blob, 16-tile or 3x3 template as a PNG plus a TileSet .tres with the peering bits already set, so you only paint over the template. The Godot TileMapLayer tutorial covers layers, collision and painting.
Transparent backgrounds and crisp pixel art
- Transparency. Ziva asks the image model for a real transparent background on every sprite and saves a PNG with an alpha channel. Many chat apps paint a gray-and-white checkerboard into the pixels instead. To check any PNG, put it over a colored ColorRect in Godot.
- Pixel finish. Ziva snaps pixel art to its grid with nearest-neighbor scaling, makes every pixel fully opaque or fully transparent and limits the palette to 16 colors, so there are no blurry in-between pixels.
- Blurry in Godot. Godot's default filter smooths small sprites. Set Project Settings → Rendering → Textures → Canvas Textures → Default Texture Filter to Nearest, or set Texture → Filter to Nearest on one node. Ziva's own pixel-art results remind the agent to do this, but it does not change import settings for you.
Seamless textures and normal maps
A Ziva tile is a seamless texture you can also use outside a TileMap. In 2D, set Texture → Repeat to Enabled on a Sprite2D, turn on Region and make the region larger than the texture; in 3D, put the PNG in a StandardMaterial3D's Albedo → Texture and raise UV1 → Scale. Ziva does not make normal maps or PBR materials. For 2D lighting, Ziva's free Normal Map Generator makes one from a sprite in your browser; for 3D materials, Scenario's Godot plugin generates PBR materials, and the Seamless Texture Generator makes your own image tileable.
What Ziva's image generation doesn't do
- One image per request; no variations, seeds or style presets. Ask again for another take.
- No full tileset, autotile or terrain set, and no multi-row or 4 and 8-direction sprite sheets.
- No normal maps, PBR materials, background removal, upscaling or editing of an existing image.
- Named characters and brands are rejected by the image model; describe the look instead.
- In Godot it works in Ziva's default (agent) mode, not in Plan or Ask mode.
When another tool is better
- Large, consistent pixel-art sets, 8-direction characters and Wang tilesets: PixelLab or Retro Diffusion, then import the files.
- PBR materials and normal maps for 3D: Scenario's Godot plugin.
- Free, ready-made art with a clear license: Kenney's CC0 packs.
- Hand-drawn polish: generate a base with any tool, then clean it up in Aseprite or Pixelorama. The pixel art tutorial covers editing and sprite-sheet export.
Related reading
- How to generate 3D models for Godot with AI
- How to generate sound effects for Godot with AI
- Create and test: images, sound and 3D models